> ## Documentation Index
> Fetch the complete documentation index at: https://docs.anchorage.com/llms.txt
> Use this file to discover all available pages before exploring further.

# Joining and switching accounts

> Join new accounts and switch between organizations.

export const ImageCarousel = ({images, perView = 3, children}) => {
  const [page, setPage] = useState(0);
  const [imgH, setImgH] = useState(0);
  const stripRef = useRef(null);
  const THUMB_MAX_WIDTH = 220;
  const PEEK_WIDTH = 34;
  useEffect(() => {
    const strip = stripRef.current;
    if (!strip) return;
    const measure = () => {
      const box = strip.querySelector("[data-carousel-imgbox]");
      if (box && box.clientHeight) setImgH(box.clientHeight);
    };
    measure();
    const ro = new ResizeObserver(measure);
    ro.observe(strip);
    return () => ro.disconnect();
  }, []);
  const fromChildren = React.Children.toArray(children).map(c => c && c.props && c.props.src ? {
    src: c.props.src,
    alt: c.props.alt
  } : null).filter(Boolean);
  const items = fromChildren.length ? fromChildren : images || [];
  if (!items.length) return null;
  const count = items.length;
  const columns = Math.min(perView, count);
  const totalPages = Math.ceil(count / columns);
  const showControls = totalPages > 1;
  const goTo = p => setPage((p % totalPages + totalPages) % totalPages);
  const prev = () => goTo(page - 1);
  const next = () => goTo(page + 1);
  const start = page * columns;
  const visible = items.slice(start, start + columns);
  const prevPeek = start > 0 ? items[start - 1] : null;
  const nextPeek = start + columns < count ? items[start + columns] : null;
  const renderPeek = (img, side) => {
    if (!img) return null;
    const isLeft = side === "left";
    return <button type="button" onClick={isLeft ? prev : next} aria-hidden="true" tabIndex={-1} style={{
      flex: `0 0 ${PEEK_WIDTH}px`,
      width: PEEK_WIDTH + "px",
      alignSelf: imgH ? "flex-start" : "stretch",
      height: imgH ? imgH + "px" : undefined,
      border: 0,
      padding: 0,
      cursor: "pointer",
      opacity: 0.5,
      borderRadius: isLeft ? "10px 0 0 10px" : "0 10px 10px 0",
      backgroundImage: `url("${img.src}")`,
      backgroundRepeat: "no-repeat",
      backgroundSize: "auto 100%",
      backgroundPosition: isLeft ? "right center" : "left center",
      WebkitMaskImage: `linear-gradient(to ${isLeft ? "left" : "right"}, #000 15%, transparent 100%)`,
      maskImage: `linear-gradient(to ${isLeft ? "left" : "right"}, #000 15%, transparent 100%)`
    }} />;
  };
  const arrowStyle = {
    flex: "0 0 auto",
    width: "30px",
    height: "30px",
    borderRadius: "50%",
    border: "1px solid var(--ad-border, #e4e5e7)",
    background: "var(--background, #fff)",
    fontSize: "16px",
    lineHeight: "28px",
    textAlign: "center",
    cursor: "pointer",
    padding: 0
  };
  return <div style={{
    outline: "none",
    margin: "1.5rem 0"
  }} role={showControls ? "group" : undefined} aria-label={showControls ? "Screenshot carousel" : undefined} aria-roledescription={showControls ? "carousel" : undefined}>
      <div style={{
    display: "flex",
    alignItems: "center",
    gap: "10px"
  }}>
        {showControls && <button type="button" onClick={prev} aria-label="Previous screenshots" style={arrowStyle}>
            ‹
          </button>}

        <div ref={stripRef} style={{
    display: "flex",
    flexWrap: "nowrap",
    alignItems: "flex-start",
    gap: "14px",
    justifyContent: "center",
    flex: 1
  }}>
          {renderPeek(prevPeek, "left")}
          {}
          {Array.from({
    length: columns
  }).map((_, i) => {
    const img = visible[i];
    const slotStyle = {
      margin: 0,
      flex: "1 1 0",
      maxWidth: THUMB_MAX_WIDTH + "px",
      minWidth: 0
    };
    if (!img) {
      return <div key={start + i} aria-hidden="true" style={{
        ...slotStyle,
        visibility: "hidden"
      }} />;
    }
    return <div key={start + i} style={slotStyle}>
                <span data-carousel-imgbox style={{
      display: "block"
    }}>
                  <img src={img.src} alt={img.alt ?? ""} style={{
      display: "block",
      width: "100%",
      height: "auto",
      margin: 0,
      borderRadius: "10px",
      border: "1px solid var(--ad-border, #e4e5e7)"
    }} />
                </span>
                {img.alt && <div style={{
      marginTop: "6px",
      fontSize: "12px",
      lineHeight: 1.4,
      color: "var(--ad-muted, #6b7280)",
      textAlign: "center"
    }}>
                    {img.alt}
                  </div>}
              </div>;
  })}
          {renderPeek(nextPeek, "right")}
        </div>

        {showControls && <button type="button" onClick={next} aria-label="Next screenshots" style={arrowStyle}>
            ›
          </button>}
      </div>

      {showControls && <div style={{
    textAlign: "center",
    marginTop: "8px",
    fontSize: "12px",
    color: "var(--ad-muted, #6b7280)"
  }}>
          {start + 1}
          {visible.length > 1 ? "–" + (start + visible.length) : ""} of {count}
        </div>}
    </div>;
};

If your organization has more than one account with Anchorage Digital, you may join multiple accounts and navigate between them from the iOS app.

## Joining a new account

<Steps>
  <Step title="Initiate joining">
    Tap **Add user** in the iOS app, then submit biometric authentication.
  </Step>

  <Step title="Navigate to organization settings">
    Go to the **Settings** icon (bottom right), tap **Organization**, and select **Join a new organization**.
  </Step>

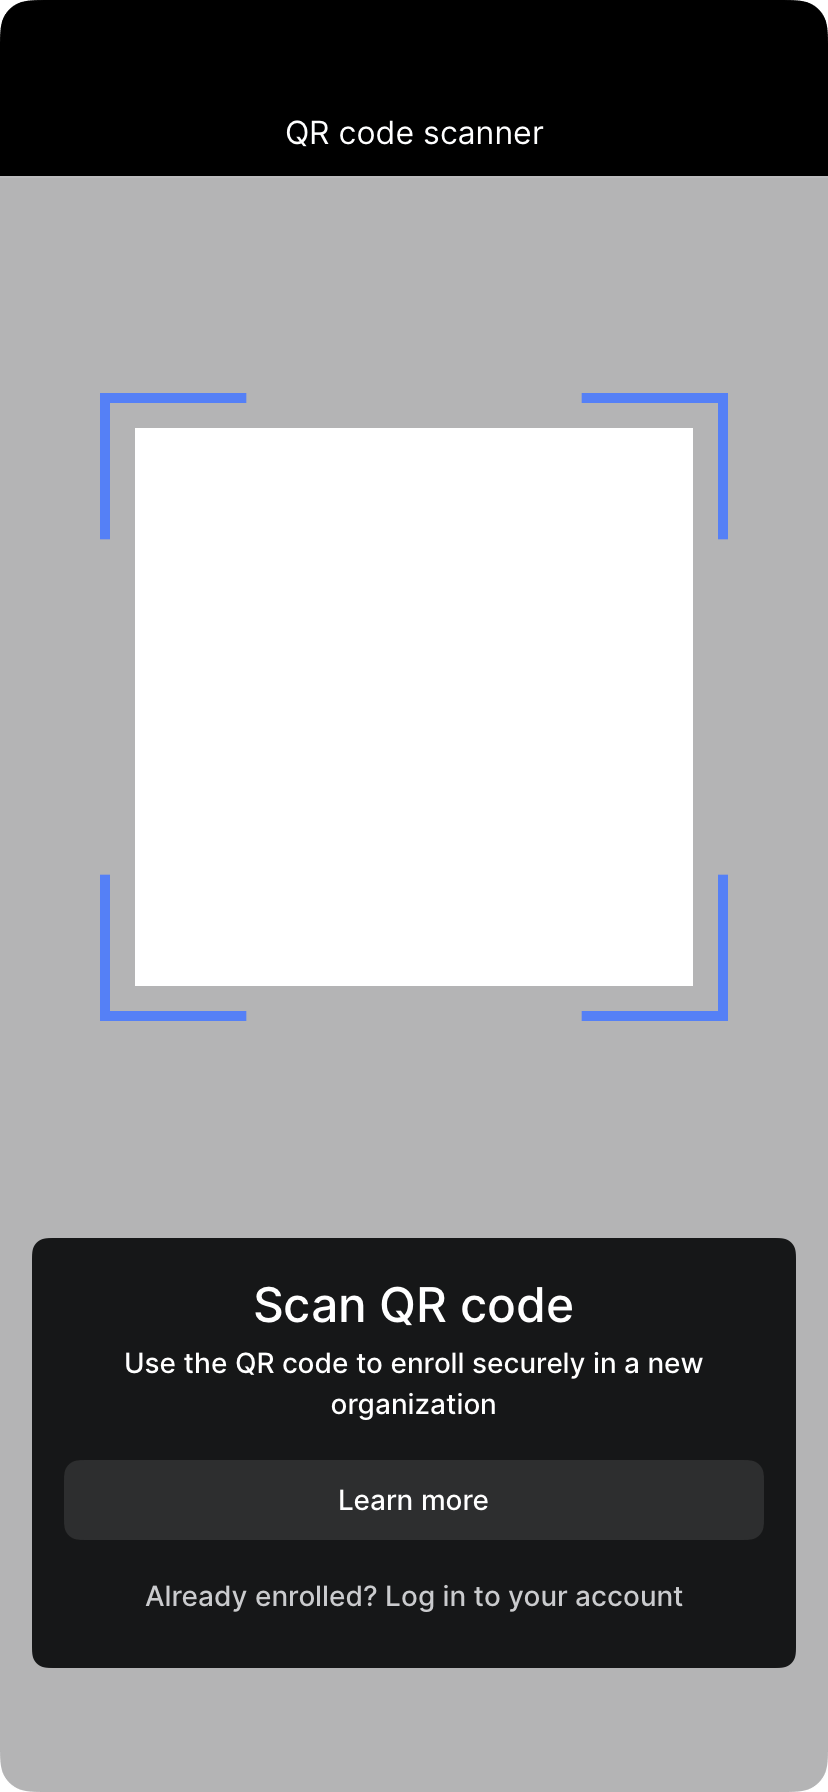
  <Step title="Scan the enrollment QR code">
    Scan the enrollment QR code provided by an administrator of the new account.
  </Step>

  <Step title="Await approval">
    Wait for the operation to be approved. Once approved, you will gain access to the new account.
  </Step>
</Steps>

<ImageCarousel>
  <img src="https://mintcdn.com/deployment-4/dnKKK5u4vRePxCW5/knowledge-base/images/screenshots/settings-organization-row.png?fit=max&auto=format&n=dnKKK5u4vRePxCW5&q=85&s=cf0c3f712b6d5ba985172682dfd9b6bb" alt="Settings screen with the Organization row highlighted" width="828" height="1792" data-path="knowledge-base/images/screenshots/settings-organization-row.png" />

  <img src="https://mintcdn.com/deployment-4/Q6VrRBiEEXtXFQnt/knowledge-base/images/screenshots/device-enrollment-scanner-anchorage.png?fit=max&auto=format&n=Q6VrRBiEEXtXFQnt&q=85&s=7960bfb0d0f89978f72dd457391ebbd9" alt="QR code scanner screen for enrolling in an organization" width="828" height="1792" data-path="knowledge-base/images/screenshots/device-enrollment-scanner-anchorage.png" />
</ImageCarousel>

## Switching accounts

Once you have access to multiple accounts, you can navigate between them at any time.

Navigate to the **Settings** icon in the bottom right of the iOS app, then tap **Organization** to see a list of your accounts and switch between them.

<ImageCarousel>
  <img src="https://mintcdn.com/deployment-4/dnKKK5u4vRePxCW5/knowledge-base/images/screenshots/settings-organization-row.png?fit=max&auto=format&n=dnKKK5u4vRePxCW5&q=85&s=cf0c3f712b6d5ba985172682dfd9b6bb" alt="Settings screen with the Organization row highlighted" width="828" height="1792" data-path="knowledge-base/images/screenshots/settings-organization-row.png" />
</ImageCarousel>