

What you can do where
You can create, list, and delete USD bank recipients (fiat trusted destinations) via API. To list them, call
GET /v2/trusted_destinations and filter on type == "fiat". To add them in the web dashboard instead, see Adding a USD trusted destination in the USD banking guide.
Editing trusted destinations via API isn’t supported. To change a trusted destination, edit it in the web dashboard, or delete it and create a new one.
Sending to your own org’s addresses
You can allowlist addresses that belong to your own organization as trusted destinations to tag and label critical internal addresses. This is purely a convenience for recognition — it isn’t required for internal movement. If your concern is avoiding per-transaction quorum when moving assets between your own wallets, use the internal transfer API instead. Internal transfers set bothsource.type and destination.type to WALLET and don’t require a trusted destination, allowlisting, or AML information.
Create a trusted destination via API
Requires theManage Trusted Destinations permission. Adding a trusted destination requires quorum approval.
isNetworkLevel: true to let the destination receive any asset on that network (digital assets only).
Create a USD trusted destination via API
Use the samePOST /v2/trusted_destinations endpoint. Set type to "fiat" and describe the bank recipient in the fiat object instead of address and assetType. All trusted destinations in one request must be the same type, so send USD and digital asset destinations in separate requests. Adding a USD trusted destination requires quorum approval.
Use
ABA for domestic wires and BIC with an intermediaryBank for international wires. Track approval with GET /v2/trusted_destinations/{creationRequestId}/status, using the idempotentId from your request.
Delete a trusted destination via API
CallDELETE /v2/trusted_destinations/{trustedDestinationId} to remove a digital asset or USD trusted destination. Requires the Manage Trusted Destinations permission. Get the ID from GET /v2/trusted_destinations.
trustedDestinationAmlQuestionnaire fields
Required for Anchorage Digital Bank clients adding trusted destinations via API.
Answer the questions below in order to see exactly which fields apply to your case, and the resulting payload:
Connect a trusted destination to an API key
If you’re using the Transfers API to transfer to a trusted destination, you need to configure your API key’s permission group to allow it. There are two options, set when configuring the Transfers outside Anchorage permission on your API key.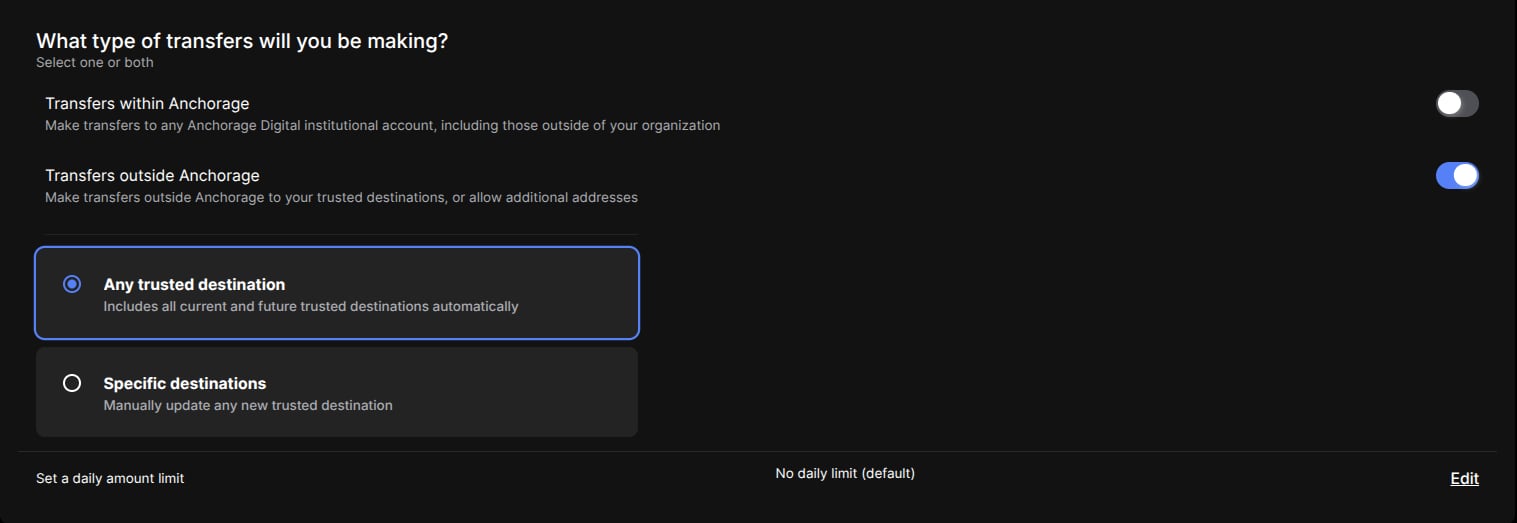
API key transfer configuration showing the trusted destination options
Specific destinations (default)
By default, your API key is scoped to Specific destinations. Once a trusted destination has been added and approved, you must also add it to the API key’s permission group before you can transfer to it. See Permission groups and API keys for the step-by-step flow.Fiat trusted destinations can’t be added to a permission group’s specific-destinations list. If you’re transferring USD to bank recipients via the Transfers API, you must select Any trusted destination instead.