

Crypto trusted destinations
Trusted destinations for crypto are per-network. The same address on Ethereum and on Base are two separate trusted destinations, so add one for each network you’ll withdraw to. A withdrawal can fail if the address is allowlisted on a different network than the one you’re sending on. Smart-contract and program addresses can also be added as trusted destinations. Self-service whitelisting for program-derived (off-curve) addresses is coming soon — for now, contact your client experience team to add one on your behalf.Adding a single crypto trusted destination
1
Open trusted destinations
In Settings, under Trusted addresses, select Trusted destinations, then select Add.
2
Select single address
Select Add single address.
3
Enter address details
Select the asset, enter the address, provide a name and description, then select Continue.
4
Fill out the form
Complete the address details form and select Continue. Optionally add a comment.
5
Confirm and approve
Review the operation details and select Confirm and submit for approval. Complete the endorsement process in the Anchorage Digital iOS app.
Adding multiple crypto trusted destinations
1
Open trusted destinations
In Settings, under Trusted addresses, select Trusted destinations, then select Add.
2
Select bulk upload
Select Upload multiple from file.
3
Download and complete the template
Download the provided Excel spreadsheet template and fill it out in your preferred spreadsheet editor (Excel or Google Sheets). Save the completed file as a CSV.
4
Upload the CSV
Upload your completed CSV file to the web dashboard.
5
Review and submit
Review the list of trusted destinations, make any necessary adjustments, and select Submit for approval. Complete the endorsement process in the iOS app.
Template fields
The required fields above match the ones marked with a red asterisk in the downloadable template.
USD trusted destinations
For USD withdrawals, you add the recipient’s bank information as a trusted destination. See USD withdrawals for the step-by-step process.Sending to your own org’s addresses
You can add addresses that belong to your own organization as trusted destinations to tag and remember critical internal addresses. This is entirely optional — you don’t need a trusted destination to send to your own vaults. When withdrawing to an address your organization already controls, select the destination type that fits your workflow: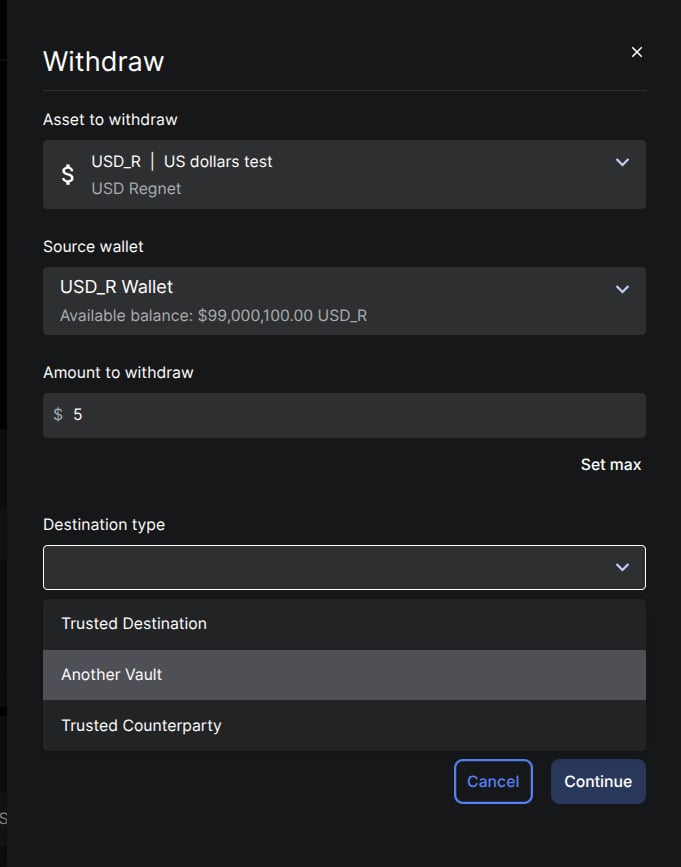
Select Another Vault to send directly to one of your own vaults
- Another Vault — sends to one of your own vaults directly. No trusted destination setup or per-request quorum approval is needed, making this the simplest path for routine internal movement.
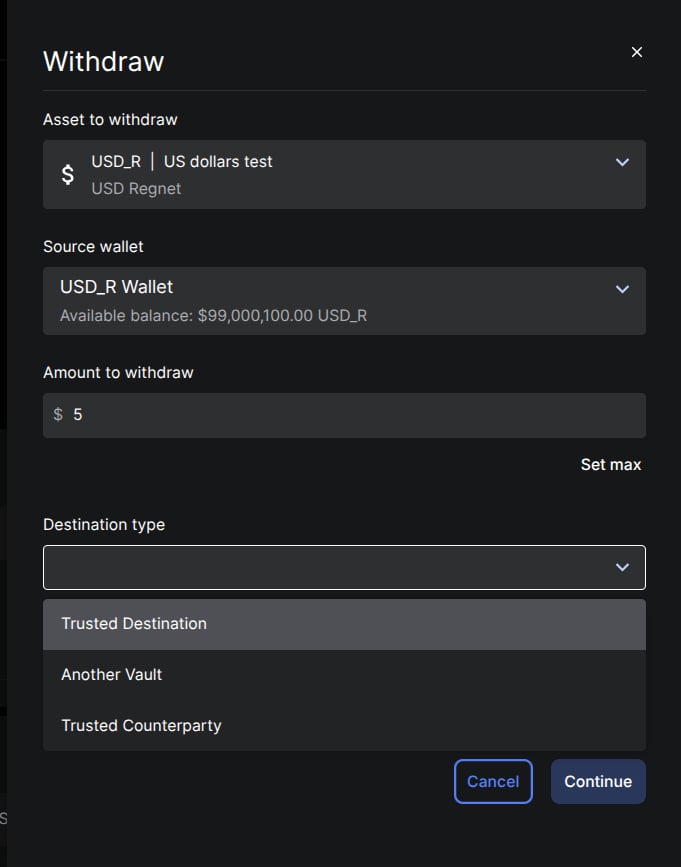
Select Trusted Destination to send to a pre-approved address you've labeled
- Trusted Destination — sends to a pre-approved, labeled address. Use this when you’ve added your own org’s address as a trusted destination so your team can recognize it by name during future withdrawals.
After you submit
Adding or removing a trusted destination goes through two stages: your own quorum approves it, then Anchorage Digital reviews it. Our review usually finishes within 15 to 20 minutes of quorum being met, and often sooner. Because the two stages run back to back, the wall-clock time from initiation to completion depends mostly on how quickly your approvers act. A request that looks slow has often been waiting on the last approver rather than on us — check the operation’s status before escalating.Exporting trusted sources and destinations
To get a full list of your organization’s trusted sources and trusted destinations, ask your client experience team or email accountexecutive@anchorage.com. A self-serve export isn’t available today, so we produce the list for you.Editing trusted destinations
The address on a trusted destination can’t be changed after submission — verify it carefully before you submit. To point at a different address, remove the existing trusted destination and add a new one. Both actions require quorum approval and Anchorage Digital review.Removing trusted destinations
1
Navigate to trusted destinations
In Settings, under Trusted addresses, select Trusted destinations.
2
Select the destination
Select the three-dot menu next to the trusted destination you want to remove.
3
Confirm removal
Select Remove. Biometric approval in the iOS app is required. Once quorum is met, Anchorage Digital will review the operation.